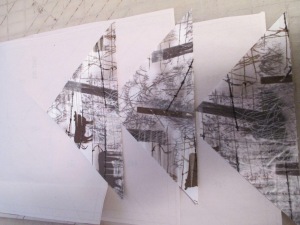
When I was notified that a blog tour would occur, I immediately “jumped on the bandwagon” and thought it sounded fun. The only issue was that I needed to create a blog — that makes sense doesn’t it. So create I did and then decided on a project. Based on our time limitations, I decided that I wanted to make something smaller and thought that the tablerunner created for Cut Loose Press would be a perfect choice. The tablerunner pattern is called Farmhouse Window Tablerunner and utilizes the concept of using the Charm Elements selections. These are units of papers to make certain elements of a design and can be used to create your own unique project. So we used Charm Elements #1 pack which has 6 flying geese units and 2 compass rose units to create our tablerunner and had some leftovers for another project in the future. Are you ready?? Let’s Go!!
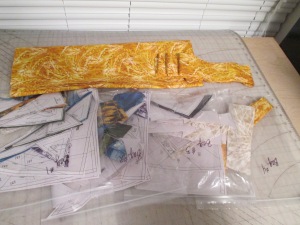
I started with gathering all my supplies for this tablerunner project.
I have lots of fabric choices so I really needed to narrow it down. I am using the yellow for my accent fabric and the light tan wheat for the backgrounds. The initial pattern is in darker fabrics and I wanted to try it with a lighter background and change the feel of the final product.
These are the fabrics that I finally decided on for the compass rose sections and the flying geese units.
Using the templates given for the background pieces, I cut my strips and then my subcuts to fit the templates. After securing the paper onto the fabric with paper clips, I cut them apart following the cut lines in numerical order. Remember to make sure that your paper clips are out of the way of your rotary cutter — they will nick your blade as I found out on another project! That is what happens when I’m in a hurry and don’t double check.
After the pieces are cut apart, I move the paper clips to the “sew side” of the template so they are ready for their placement.
I used the “baggie system” to separate my elements for construction. All the pieces are cut with the templates and the base papers to sew the fabric on to so we are ready to get to sewing! I love the templates and the bag system to keep yourself organized. One thing that I have learned and pass this along to my students is that it is all about getting organized before you begin.
This is the first unit/bag that I will make. You can see that I lined up the templates on the fabric with the paper clip on the sew side of the piece. My papers are cut about 1/8″ around the outer most dark line and I’m ready to sew 8 of these units. Let’s begin!
We glue down piece #1 — wrong side of fabric to wrong side of paper. I use two methods with this first piece of fabric. Sometimes I will then fold on the solid line using my fold template and then trim 1/4″ away using my Add-A-Quarter ruler. Other times, I will fold on the dotted line and line up the straight edge cut right on this dotted line — it all depends on the mood for the day! (Do you ever do that?)
Once the edge is established, I will then add the second piece — right sides together and sew on the solid line. I encourage you not to “play” with the fabric piece #2 when you pick it up. It is simply select, slide under your piece #1 and sew. Your thinking is all done in the organizational setup so this part is a simple habit of grab, slide and sew!
Now we are crusiing along with adding pieces — oops I messed up on the above picture. “Everything I needed to know, I learned in kindergarten” — well sometimes I forget to count in the right order. That happened here and I trimmed on the line 4 instead of line 3 — jumping ahead of myself so I’d better slow down!!
I don’t know if you can see or not, but I sewing on line 4 before line 3 — does that mean I need to go back to kindergarten and learn my numbers again? Who knows! Maybe it means that I need to not be on autopilot and check before I sew!!
This is looking much better. I’m getting very close to finishing these sections. You just have to follow the sections and remember that the line you cut on is one less than the section you are adding! The other bit of advice that I was given by Judy in a class several years ago was “remember that the piece of paper that you are folding back with be the same shape as the fabric your are putting on underneath.” I repeat this statement several times in my classes and it is really refreshing to see when it finally makes sense.
Yeah! Both bag #1 and bag #2 are finished. Remember that bag #2 is the opposite as bag #1. One is left and one is right but you still need 8 units of each for this design! Once all the sewing is done, you can trim up each unit on the outside solid black line and it looks so much better.
Moving onto bag #3 — the flying geese units. We only need 3 so you will have 3 left for another project. These are fun and easy to do but guess what? I miscounted — remember kindergarten? I needed 6 geese fabrics instead of 5 so back to my “stash” of fat eights and pick another fabric that will blend in with the other choices. You can see that I’ve organized the templates with the fabrics again — keep those sew sides “up” and then it is easy to slide under the previous fabric and sew!
Here is the first section of these units. Do you see the cow? I couldn’t resist using this feature on this fabulous fabric.
And here you go — the finished 3 flying geese and the cow is still on the first goose piece. Now to put sections together (after removing the papers).
These flying geese units needed a border (bright sunshine yellow) and a little more length to match the compass rose sections. It’s starting to blossom (this is where I think it develops it’s personality).
Okay, I put my sections together and I ended up with a corner unit. That’s not right!! Sew and unsew — back to the pattern.
This is how the pieces are supposed to be sewn together. I sewed the wrong sides together — lesson learned!!
Look mom — I made those seams come out perfect!! TWICE!! (I have my tricks to make this happen) I’m making progress!!
All of the sections are together so now it’s time to sew them together and get a border on this tablerunner. Isn’t it pretty? I’m really liking the light background and splashed of color.
And here it is — ready to be quilted. It is a fun and simple project to make and is a perfect choice for these fabrics. They add texture and color to this tablerunner and will go with a lot of decorating choices.
Thank you for going on this journey with us. We are looking forward to selling this line of fabrics in our store since we are located in Montana — the home of Quiltworx.com. They are perfect for us and for you!
Below are the other shops that participated in the blog tour. Go back and check out what they had to show and don’t forget to register for the prizes. Go to http://www.ttfabrics.com/reclaimed-west-blog-tour to register.
November 17
Carla Klop, Kits by Carla – http://www.kitsbycarla.com/blog
Catherine Wilson, Queenie Quilts – http://queeniequiltsblogs.blogspot.com
Lisa McCarthy, Compass Point Quilts – www.compasspointquilts.com
November 18
Deborah Brizendine, Just Stitchin with Deborah – http://juststitchinwithdeborah.blogspot.com/
Denise Green, HollyDee Quilts – http://hollydeequilts.net
Sandy Lueth, Totes by Sandy – http://www.totes-by-sandy.com
November 19
Cathy McKillip, Wish Upon A Quilt – http://wishuponaquilt.com/blog
Marcia Nagel/Megan Bohr, Pine Needles Quilt & Sew – http://thepineconepress.blogspot.com/
Stacey Day, Stacey in Stitches – http://staceyinstitches.wordpress.com
November 20
Barb Linares, Crafty Threads – http://craftyquilts.blogspot.com/
Jennifer Eubank, Archipelago Quilting – http://jennifersewing.wordpress.com/
Konda Luckau, Moose on the Porch Quilts – http://www.moosequilts.com/blog
Susan Nelson, Prairie Sky Quilts – http://blog.prairieskyquilting.com
November 21
Jackie Kunkel, Canton Village Quilt Works – http://cvquiltworks.com/blogs/blog
Lauren Rogers, Backdoor Quilt Shoppe – www.backdoorquiltshoppe.wordpress.com
Osie Lebowitz, From Needle and Thread – http://www.fromneedleandthread.com/
Timeless Treasures, SewTimeless (Giveaways!) – http://www.ttfabrics.com/blog/


Very pretty table runner, like your choice of colors.
LikeLike
Nancy, We will probably be kitting this one up as soon as all our fabrics arrive. It is a pretty quick project (instant gratification).
LikeLike
You runner is beautiful. Love your fabric choices
LikeLike
Your tablerunner is beautiful!
LikeLike
Love the fabrics & your project.
LikeLike
Love your pattern
LikeLike
Thank you — we have them on our website http://www.backdoorquiltshoppe.com
LikeLike
Beautiful tablerunner! I like the way you shared your boo-boos, as well as your ultimate success.
LikeLike
Linda, I like to show boo-boos because it helps my students to watch for the mixups that can occur. After all, I’m human and misread instructions and sew the wrong sides together as well. It’s a learning opportunity :)!
LikeLike
Wow, that is some job. Not sure I understand the concept of choosing different paper packs. Will have to read again/
LikeLike
Thanks for the tips and views as you worked through this table runner, I am glad I am started to paper piece, Great job Kathy in Colo
LikeLike
Rochelle,
Judy has decided to create packets of papers of different sections that she uses in her designs. These packets of papers can be used to create your own design or there are a few Cut Loose Press patterns that will use these packets of papers called Charm Elements. As an example, there is a pattern that is a tablerunner and placemats that uses a flying geese unit on the side of the placemat — just like the one I used in my tablerunner. There is a corresponding Charm Elements pack of papers that is entirely flying geese units so you can make 10 placemats using 1 Charm Element paper pack. I hope this helps to explain it a little better.
LikeLike
I have paper piecing on my to do list, but the first time I tried it was a disaster, so I keep putting something else in front of it! I will do it eventually.
LikeLike
Nice table runner.
LikeLike
Very nice table runner. Good for you for starting a blog. I haven’t arrived at that decision yet but have been thinking about it.
LikeLike
Your table runner is wonderful. I love the yellow.
LikeLike
Quilting is so addicting!
LikeLike
WOWIE!!!!! what an Awesome Runner!!! You do Amazing quilting!! This is Gorgeous!
LikeLike
Love your choice of colors in the table runner.
LikeLike